------------この記事の目次------------
SampleRobot Montage Edition 使い方 レビュー!
こんちゃ、8月下旬にYAMAHA USサイトからSampleRobot Montage のフリーダウンロード開始された。
2018年、NAMMで発表された完全自動化のサンプリングソフトウェアーで、以前までSKYLIFE社で発表はされていたが今回、Yamaha Montage にカスタマイズされなんとMontageユーザーは、フリーダウンロード出来るというからかなり嬉しい。
昔、AKAI S3200でちまちま手動でサンプリング作業をしてたのを思い出す。(笑
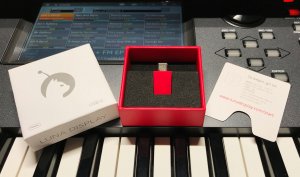
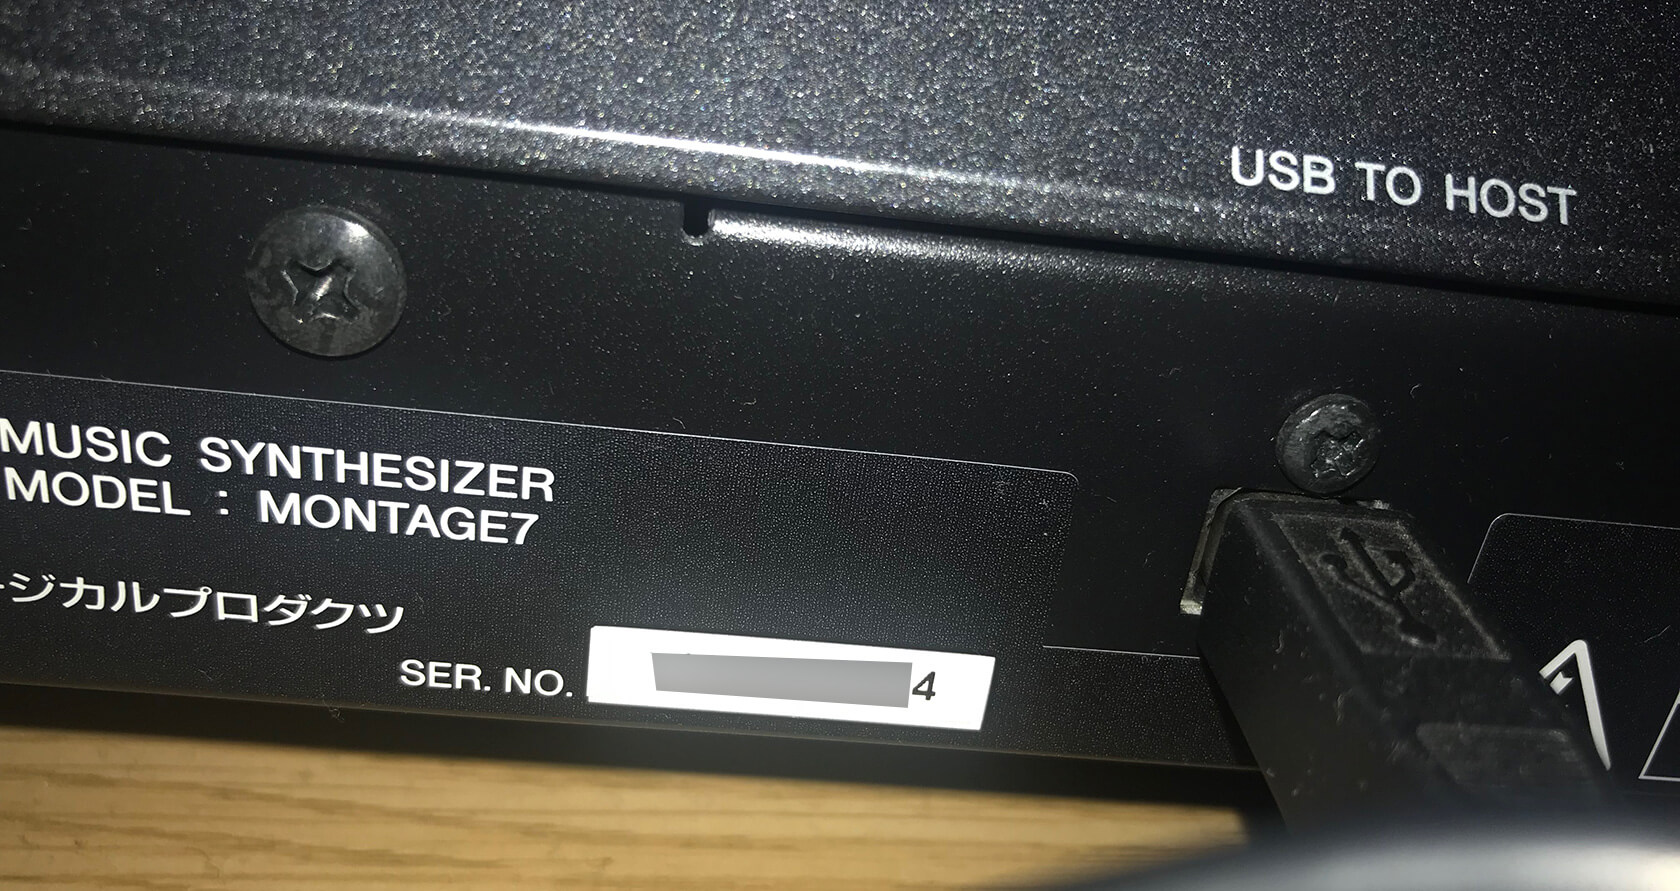
フリーダウンロードするには、Mntageのシリアルが必要になるのでMontage裏面のシリアルを確認してください。
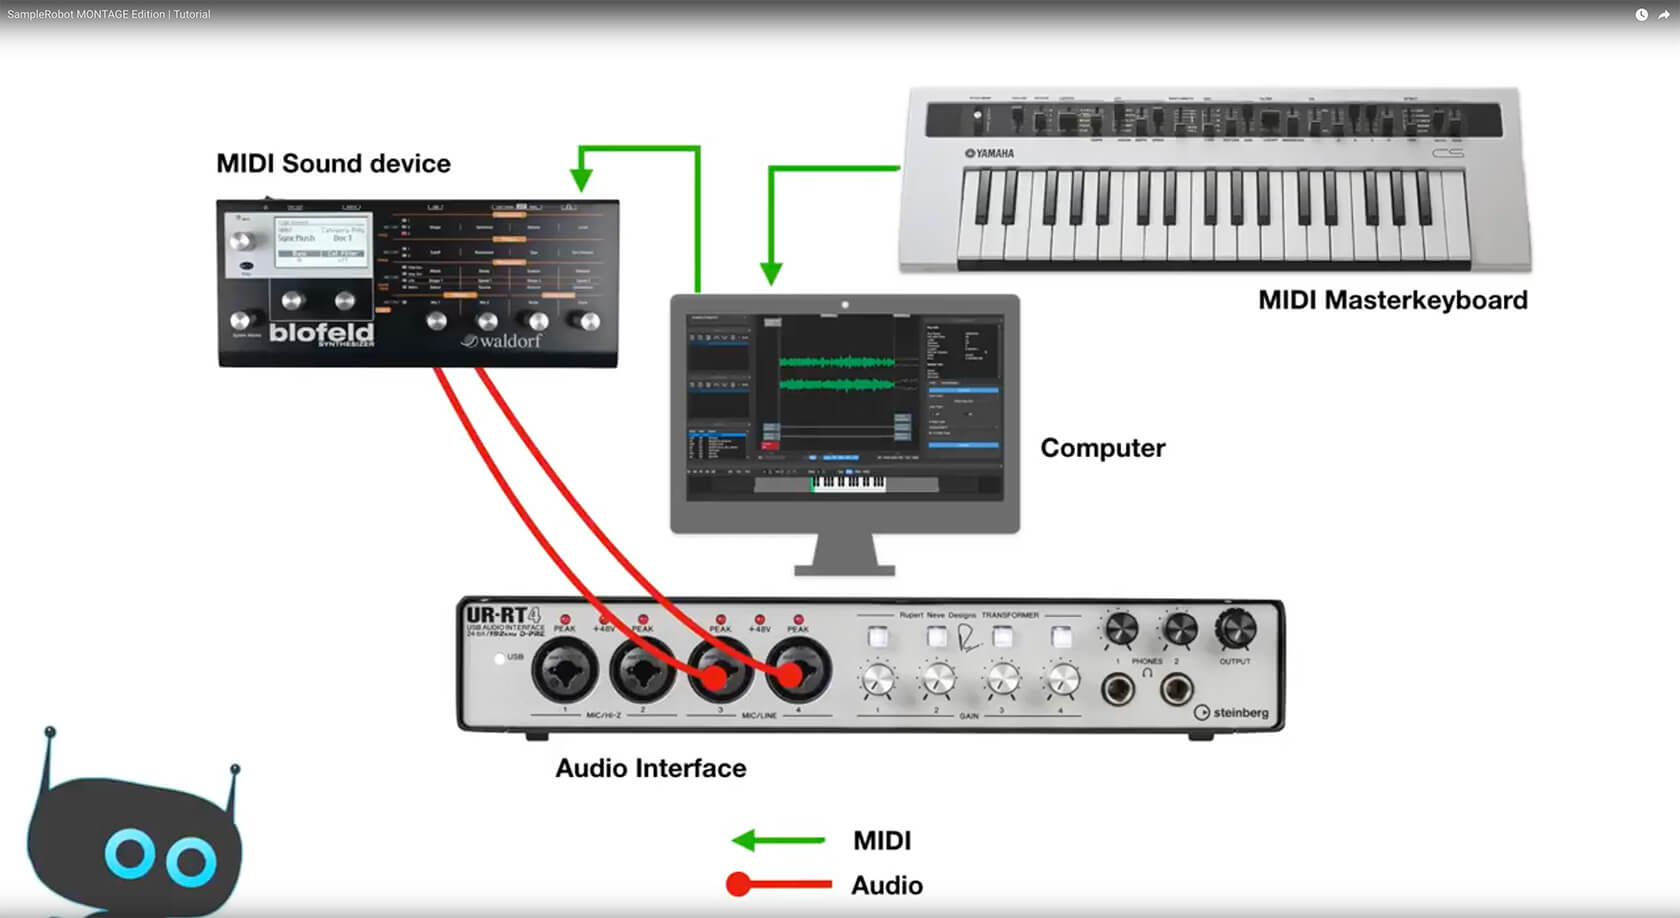
SampleRobot Montage Edition 接続方法.
接続は、いたって簡単 マスターキーボードからMIDI OUT 取り込むデバイスはMIDI IN / audioは、取り込むデバイスからオーディをアウトをオーディオインターフェイスのイン。
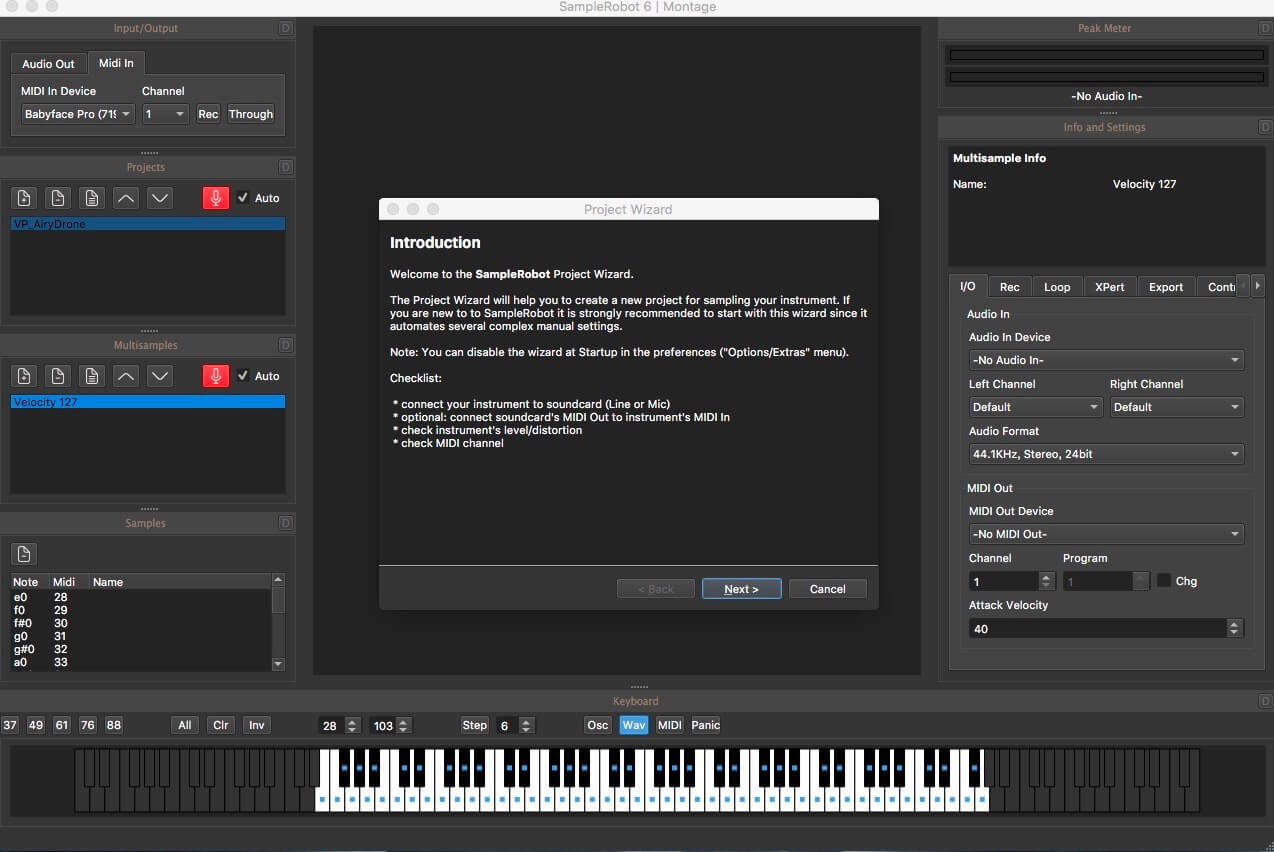
SampleRobot Montage Edition Setting.
早速、SampleRobotを起動するとwizardが立ち上がる。翻訳は、google先生です。
Welcome to the SampleRobot project wizard
The project wizard will help you to create a new project for sampling your instrument.
If your new to SampleRobot it is strongly recommended to start with this wizard since it automates several complex manual setting.
Note:you can disable the wizard at startup in the perference(“option/extras”menu).Checklist:
*connect your instrument to soundcard(line or mic)
*optional:connect soundcards midi out to instrument’s midi in
*check instrument’s level/distortion
*check midi channelSampleRobotプロジェクトウィザードへようこそ
プロジェクトウィザードを使用すると、楽器をサンプリングするための新しいプロジェクトを作成するのに役立ちます。
SampleRobotを初めて使用する場合は、いくつかの複雑な手動設定を自動化するため、このウィザードを使用することを強くお勧めします。
注意:perception( "option / extras"メニュー)の起動時にウィザードを無効にすることができます。チェックリスト:
*楽器をサウンドカードに接続する(ラインまたはマイクなど)
*オプション:サウンドカードのMIDIOUTをMIDIINに接続する
*楽器のレベル/歪みをチェックする
* midiチャンネルをチェックする
SampleRobot Montage Edition Project name.
ここは、プロジェクト名を決めるだけ。
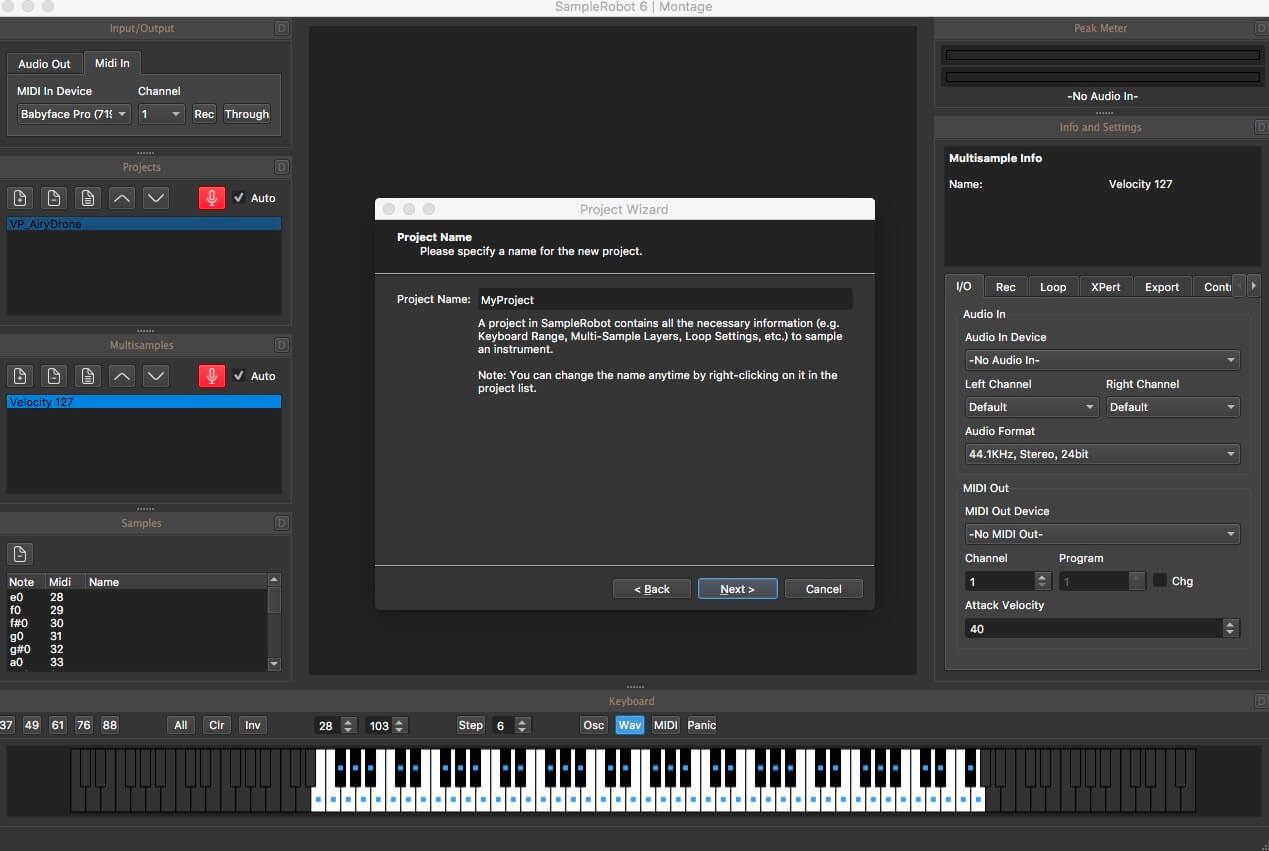
Project name
Please specify a name for the new project.
Project name :
A project in SampleRobot contains all the necessary information(e.g.keybord range, multi-sample layers,loop setting,etc.)to sample an instrument.
Note:you can change the name anytime by right-clicking on it in the project list.
プロジェクト名
新しいプロジェクトの名前を指定してください。
プロジェクト名:
SampleRobotのプロジェクトには、楽器をサンプリングするために必要なすべての情報(例えば、鍵盤範囲、マルチサンプル層、ループ設定など)が含まれています。
注:プロジェクト名を右クリックすると、いつでも名前を変更できます。
SampleRobot Montage Edition Data Path.
保存場所を決めるだけ。

Audio in device
Please select the audio in device to which your instrument/ mic is connected.
Note each SampleRobot multi-sample layer ina project can have its own input,recording.
And auto-loop settings. The default setting can be set in the preferences dialog.
デバイス内のオーディオ
機器/マイクが接続されている機器のオーディオを選択してください。
プロジェクト内の各SampleRobotマルチサンプルレイヤーは、独自の入力記録を持つことができます。
オートループの設定。 デフォルト設定は環境設定ダイアログで設定できます。
SampleRobot Montage Edition Audio Device.
接続しているオーディオデバイスを選択するだけ。
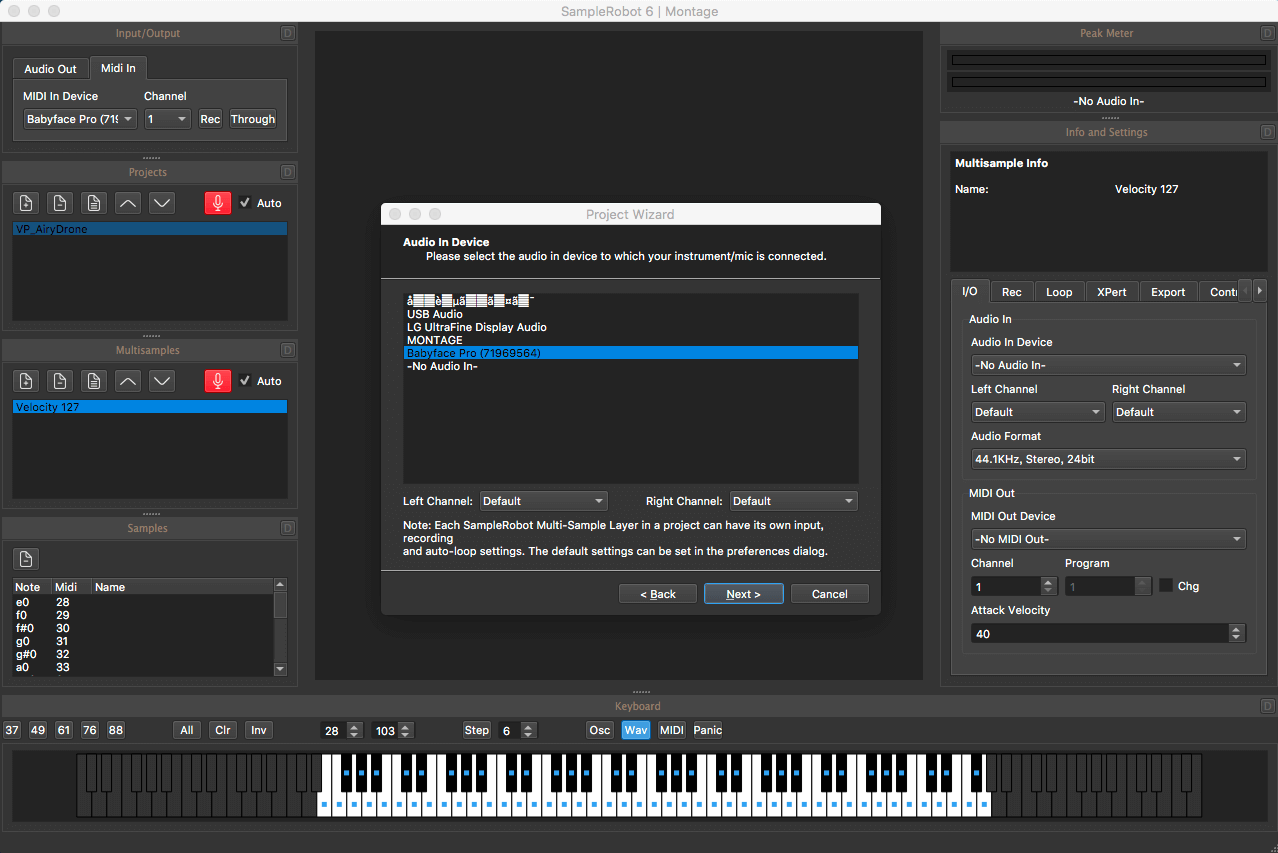
Audio in device
Please select the audio in device to which your instrument/ mic is connected.
Note each SampleRobot multi-sample layer ina project can have its own input,recording.
And auto-loop settings. The default setting can be set in the preferences dialog.デバイス内のオーディオ
機器/マイクが接続されている機器のオーディオを選択してください。
プロジェクト内の各SampleRobotマルチサンプルレイヤーは、独自の入力記録を持つことができます。
オートループの設定。 デフォルト設定は環境設定ダイアログで設定できます。
SampleRobot Montage Edition Sample Format.
サンプリング周波数を決めるだけ。MAX 192khz,Stereo 24bit までサンプリング可能です。
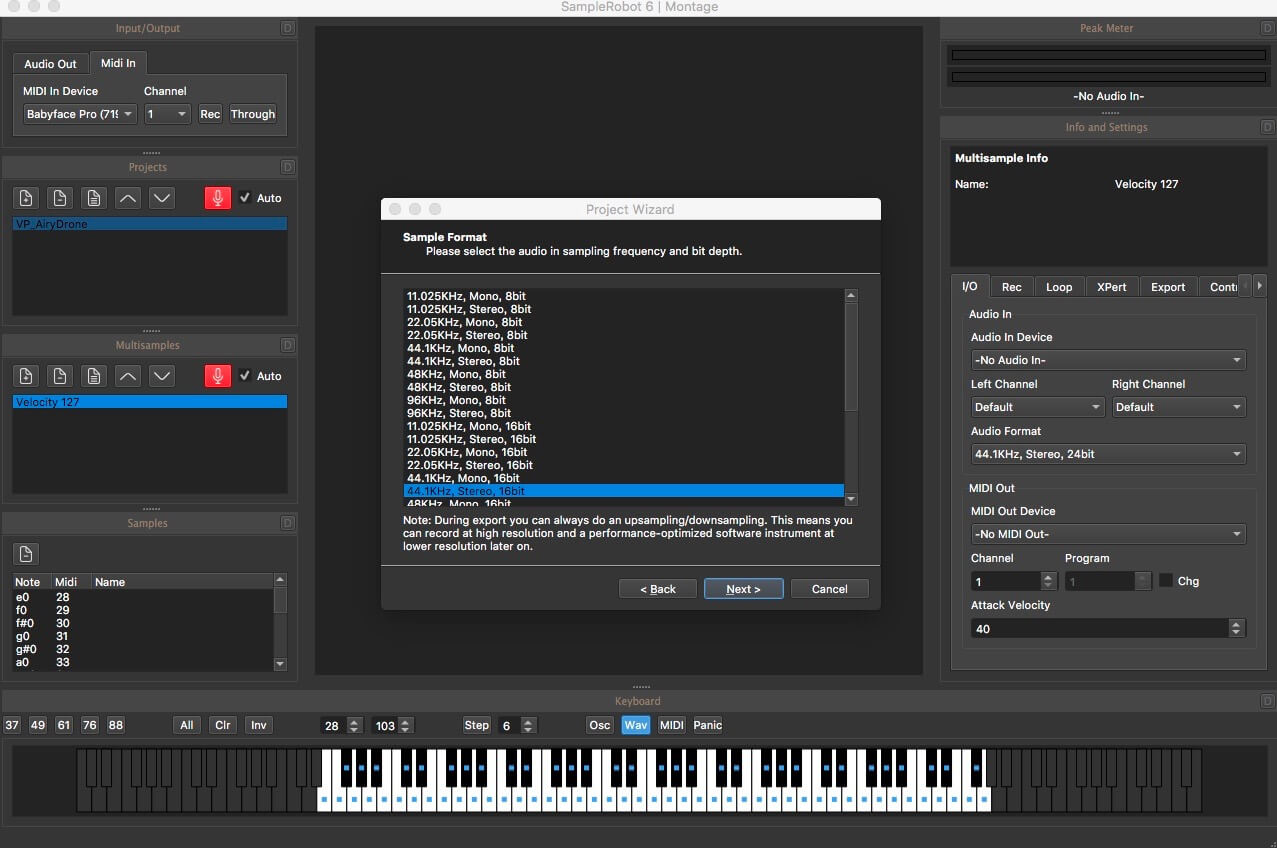
Sample format
Please select the audio in sampleing frequency and bit depth.
Note:during export you can always do an up sampling/downsampling.
This means you can record at high resolution and a performance-optimized software instrument at lower resolution later on.
サンプルフォーマット
サンプリング周波数とビット深度でオーディオを選択してください。
注:エクスポート中は常にアップサンプリング/ダウンサンプリングを行うことができます。
つまり、後で低解像度で高解像度と性能に最適化されたソフトウェア音源で録音することができます。
SampleRobot Montage Edition Recording Mode.
レコーディングモードの選択です。MIDI接続可能な楽器ならほぼオートでサンプリングしてくれます。
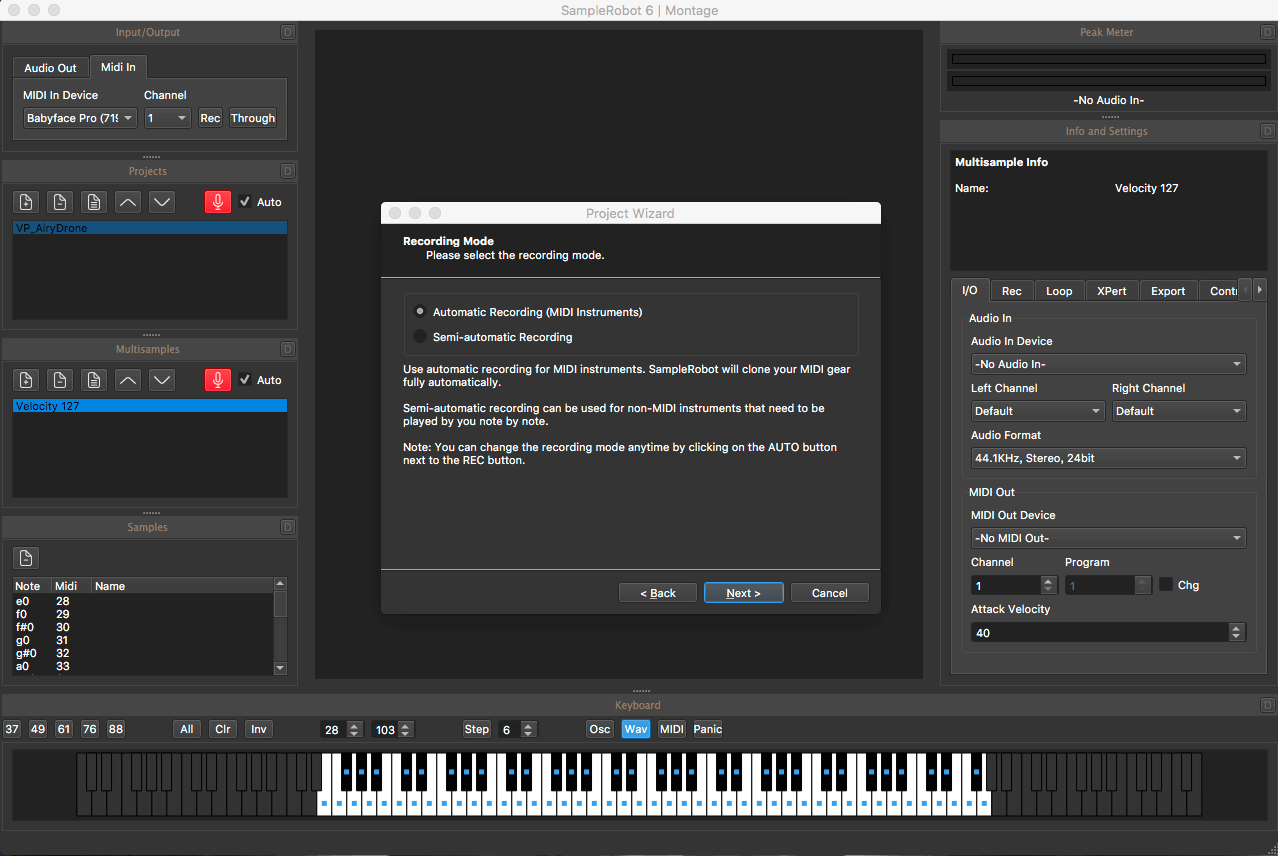
Recording mode
Please select the recording mode.
Automatic recording(midi instruments)
Semi-automatic recording
Use automatic recording for midi instrument. SampleRobot will clone midi gear fully automatically.
Semi-automatic recording can be used for non-midi instrument that need to be played by you note by note.
Note:you can change the recording mode anytime by clicking on the auto button next to the rec button.記録モード
録画モードを選択してください。
自動録音(MIDI機器)
半自動録音
midi楽器には自動録音を使用してください。 SampleRobotはMIDI楽器を完全に自動的にクローンします。
半自動録音はノートで演奏する必要のある非MIDI以外の楽器にも使用できます。
注:レコーディングボタンの横にある自動ボタンをクリックすると、いつでもレコーディングモードを変更できます。
SampleRobot Montage Edition MIDI Out Devices.
MIDI Outデバイスの選択です。

Midi out devices
Please select the midi out device to control your midi instrument.
SampleRobot will send midi notes to the unit then record back the audio.MiDiアウトデバイス
MIDI機器をコントロールするためにMIDI機器を選択してください。
SampleRobotはユニットにMIDIノートを送り、オーディオを録音します。
SampleRobot Montage Edition MIDI Out Setting.
MiDi Out チャンネルの設定です。
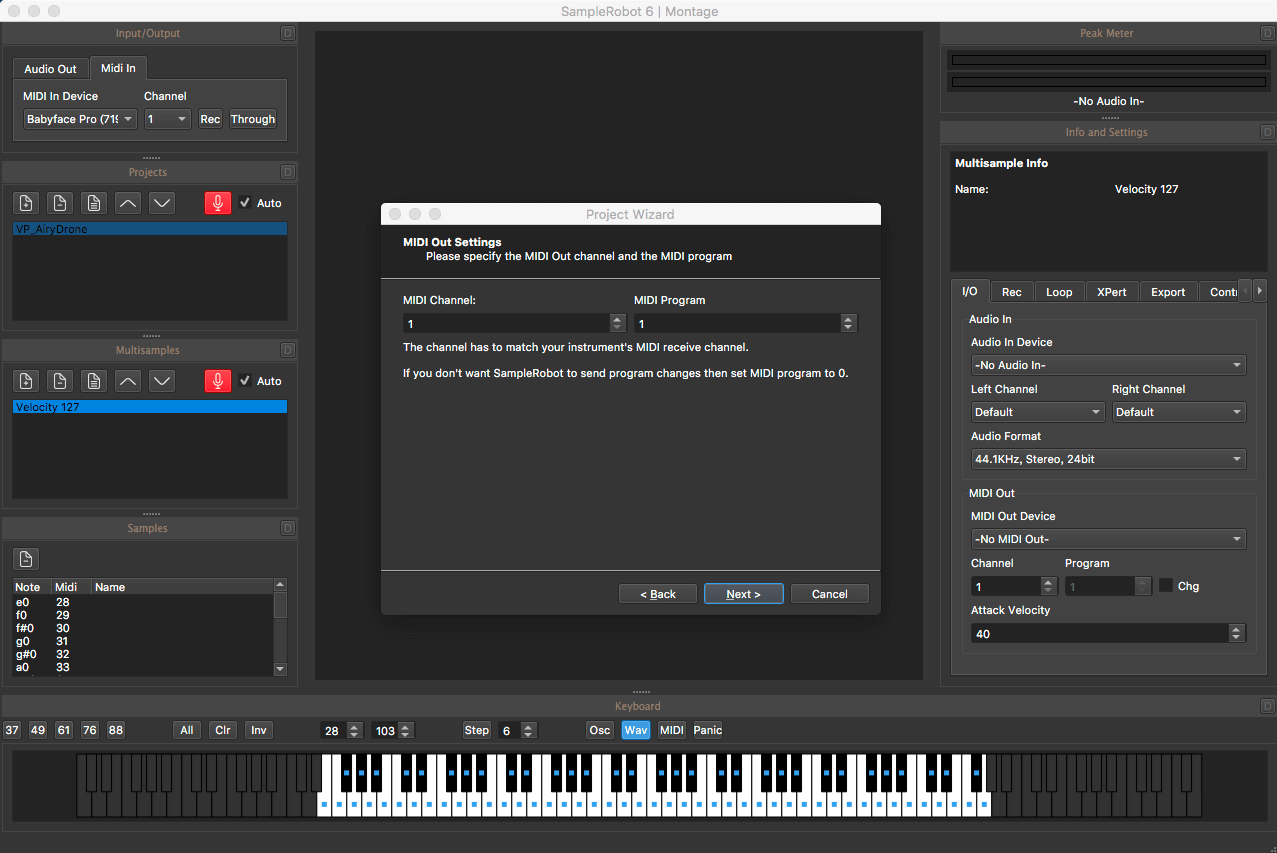
Midi out setting
Please specify the Midi out and the midi program
The channel has match your instrument”s MIDI receive channel.
If you dint”t want SampleRobot to send program changes then set MIDI program to 0.Midi Out セッティング
ミディ・アウトとミディ・プログラムを指定してください
チャンネルは楽器のMIDI受信チャンネルと一致しています。
SampleRobotでプログラムの変更を送信したい場合は、MIDIプログラムを0に設定してください。
SampleRobot Montage Edition Sampling Range.
サンプリングレンジ(オクターブ)を設定します。
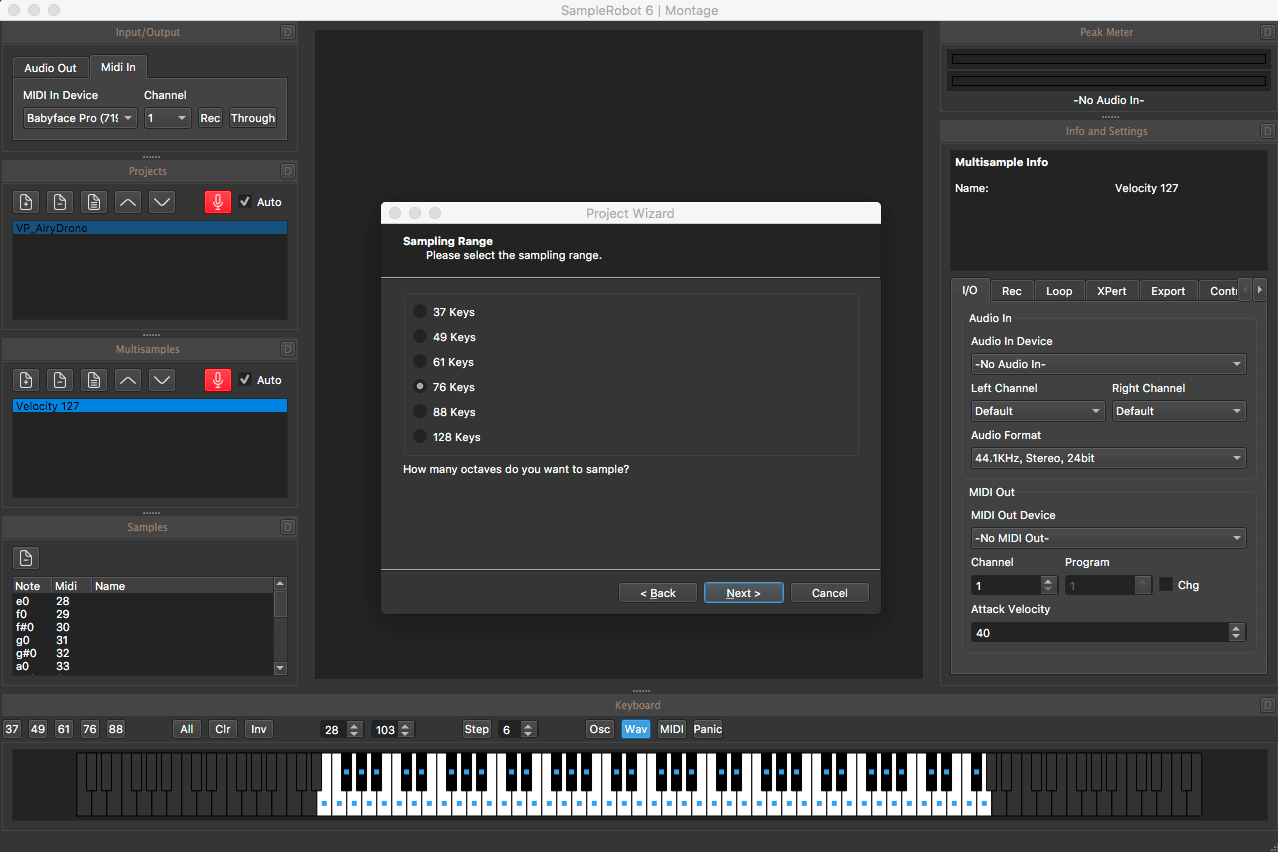
Sampling Range
Please select the sampling range.
How many octaves you want to sample?サンプリング範囲
サンプリング範囲を選択してください。
サンプリングしたいオクターブはいくつですか?
SampleRobot Montage Edition Velocity Layers.
velocity レイヤーの設定です。99を設定すると1音階99回サンプリングします。お勧めは、2〜4レイヤーです。 MAX値は、99です。
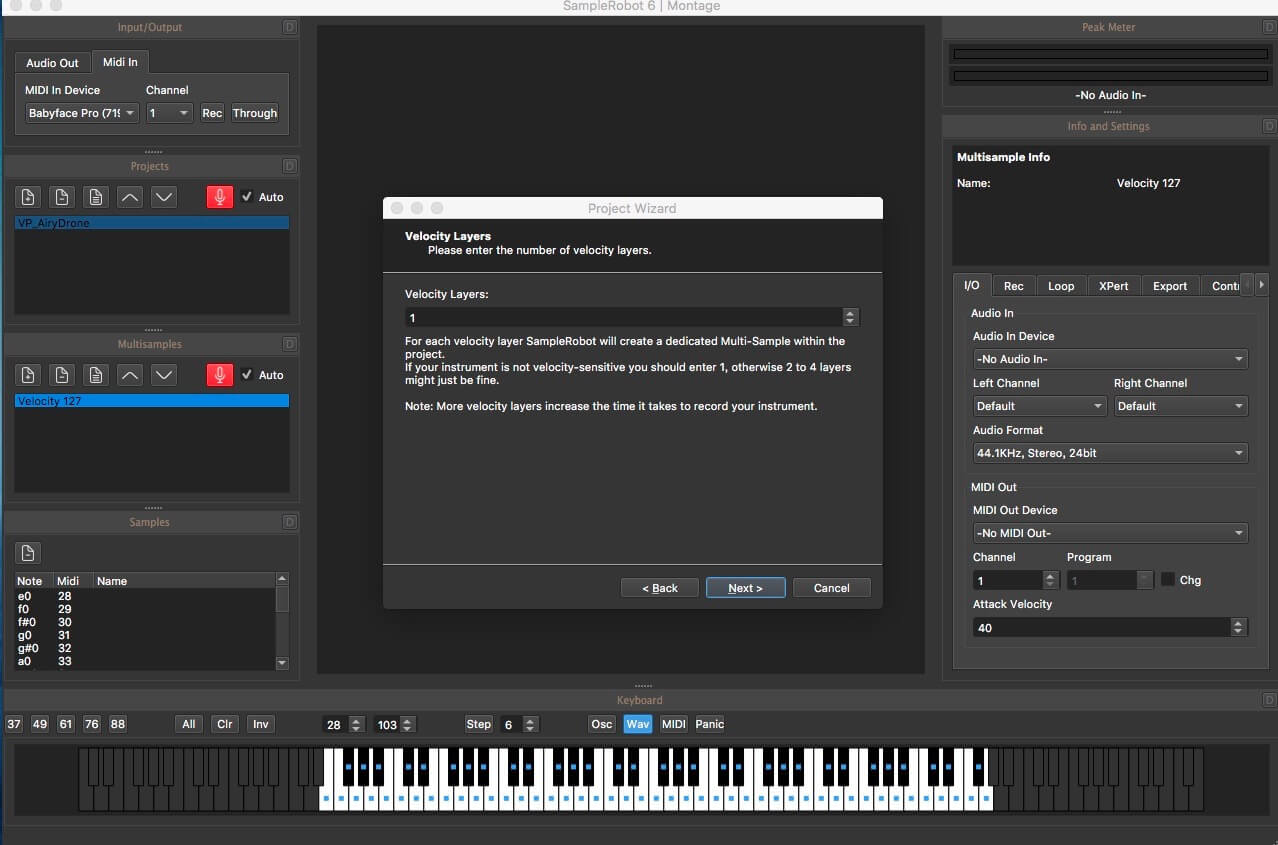
Velocity Layers
Please enter the number of velocity layers.
For each velocity layer Samplerobot will create a dedicated Multi-Sample within the project.
If your instrument is not velocity-sensitive you should enter 1,otherwise 2 to 4 layers might just be fine.
Note:More velocity layers increase the time it takes record your instrument.ベロシティレイヤー
鍵盤を叩く速さの数値を入力してください。各ベロシティレイヤーで、サンプラーロボットはプロジェクト内に専用のマルチサンプルを作成します。
あなたの楽器がベロシティに敏感でない場合は、1を入力する必要があります。そうでない場合は、2〜4のレイヤーだけでも問題ありません。
注:ベロシティレイヤーを増やすと、楽器を録音する時間が長くなります。
SampleRobot Montage Edition Key Step.
キーステップの設定。MIDI機器なら6がお勧めです。
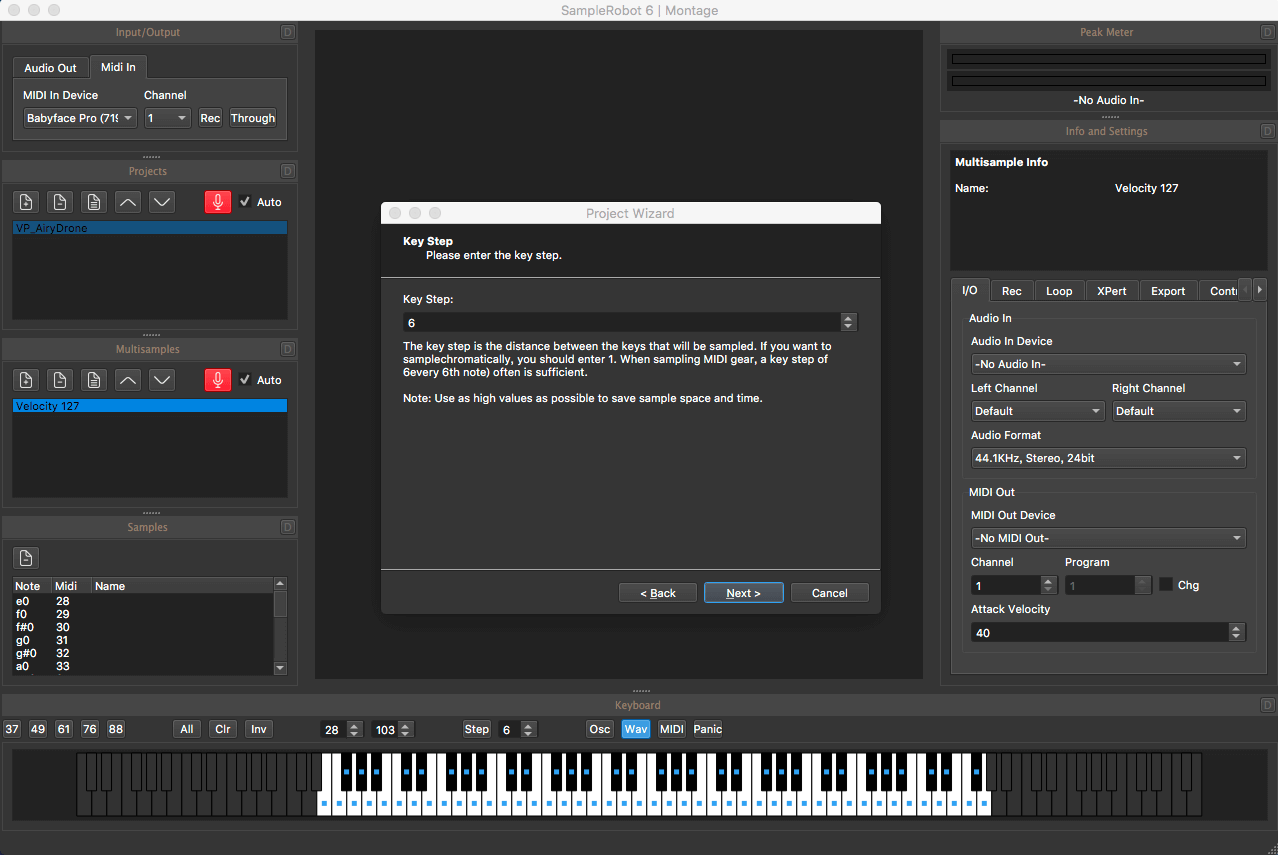
Key step
Please enter the key step.
The Key step is the distance between the keys that will be samples.
if you want to sample chromatically, you should enter 1.
When sampling MIDI gear, a key step of 6 ever 6th note) often is sufficient.
Note:Use as high values as possible to save sample space and time.キーステップ
キーステップを入力してください。
キーステップは、サンプルとなるキーの間の距離です。
クロマチックにサンプリングする場合は、1を入力する必要があります。
MIDI機器をサンプリングするときは、6番目の6分音符の重要なステップ)で十分です。
注:サンプルのスペースと時間を節約するために、可能な限り高い値を使用してください。
SampleRobot Montage Edition MiDi Out Setting.
前項のMidiOutSettingと表題がかぶっていますがここでは、わからない場合は、音の長さドラム系は、5秒 パッド系は、12秒 ピアノ系は、25秒を勧めています。 鍵盤を離してからの音の発音の秒数も設定できます。ここでの設定は、結構肝なので十分にサンプルリングする音を聞いて設定してください。Note Lengthが鍵盤を押した時の音の長さ。ReleaseLengthが鍵盤を離した時に出る音の長さです。
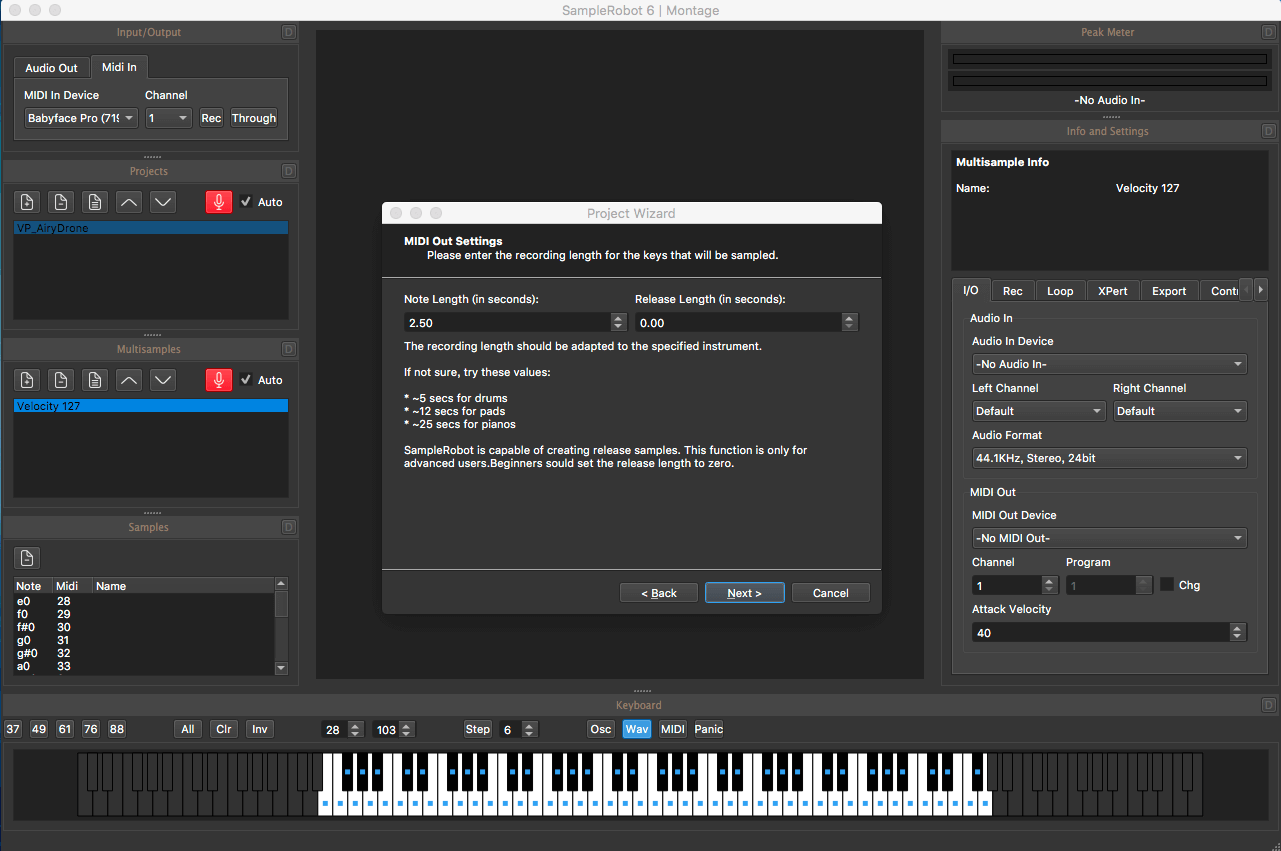
Midi Out Settings
Please enter the recording length for the key that will be sample.
The recording length should be adapted to the specified instrument.
If not sure, try these values:
5secs for drums
12secs for pads
25secs for pianos
SampleRobot is capable of creating release samples.
This function is only for advanced users.
Beginners sould set the release length zero.ミディアウト設定
サンプルとなる鍵の音の長さを入力してください。
録音の長さは指定された楽器に合わせる必要があります。
わからない場合は、次の値を試してください:
ドラムの場合は5秒
パッドは12秒
ピアノの場合は25秒
SampleRobotはリリースサンプルを作成することができます。
この機能は、上級ユーザーのみが使用できます。
初心者はリリース長をゼロに設定する必要があります。
SampleRobot Montage Edition Auto Loop.
オートループ設定です。
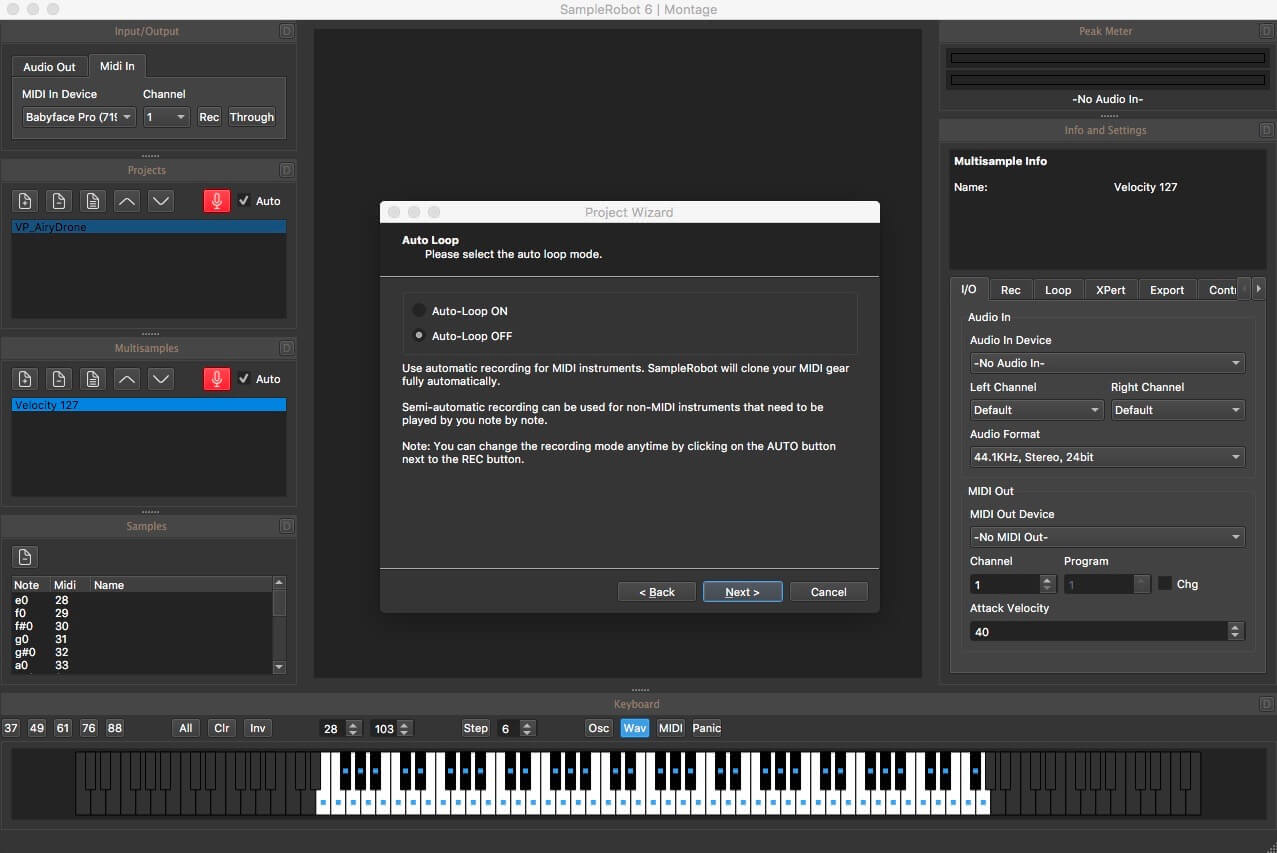
Auto Loop
Please select the auto loop mode
Use automatic recording for MIDI instruments.
SampleRobot will clone your MIDI gear fully automatically.
Semi-Automatic recording can be used for non-MIDI instruments that need to be played by you note by note.
Note:You can change the recording mode anytime by clicking on the auto button next to the REC button.オートループ
自動ループモードを選択してください
MIDI楽器の自動録音を使用します。
SampleRobotはMIDI機器を完全に自動的にクローンします。
半自動録音は、ノートで演奏する必要がある非MIDI楽器にも使用できます。
注:RECボタンの横にある自動ボタンをクリックすると、いつでも記録モードを変更できます。
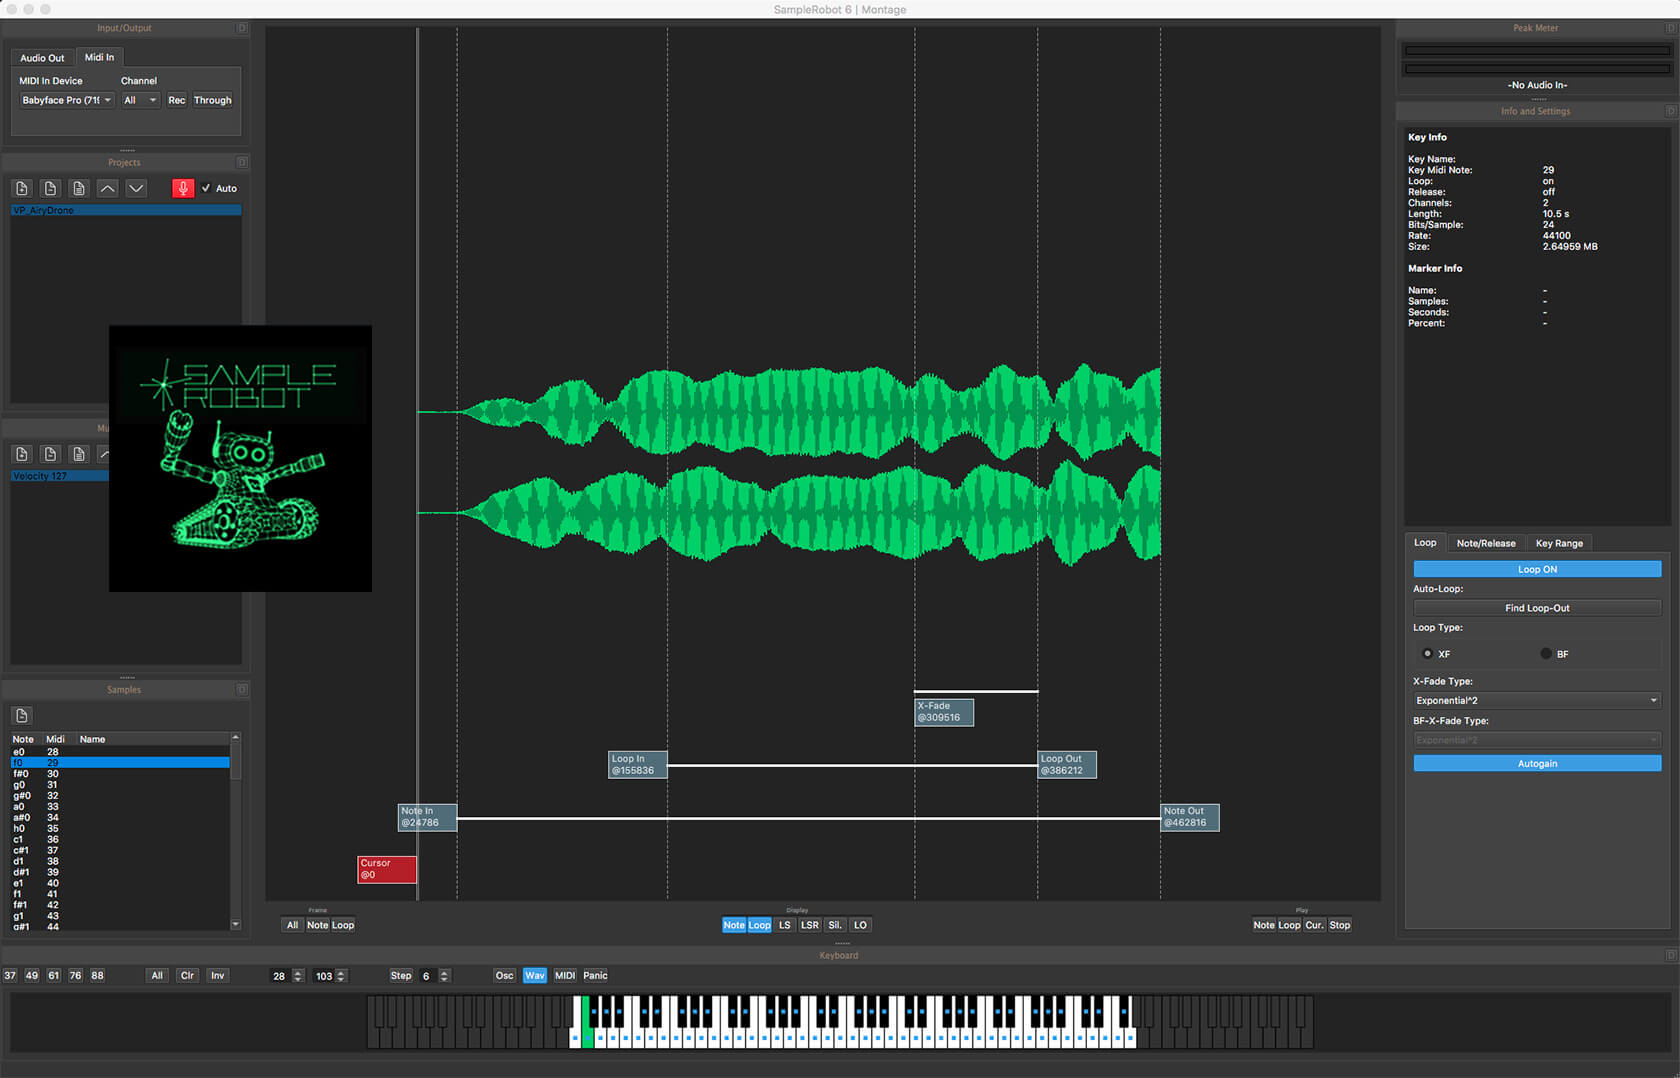
SampleRobot Montage Edition Auto Loop setting.
前項でLoop-onにするとLoop設定画面になります。Loop-offの場合は、設定終了画面に映ります。ここでは、音色の複雑さについて選択します。simpleは、無変調のパッド、オルガンなど音に変化があまりないシンプルな音色の場合シンプルを選択。Intermediateは、ドラムループやパッド、など大体はこのIntermediateでいいと思います。Complexは、音色が時間と共に減衰したり変化があるような場合は、Complexを選択してください。
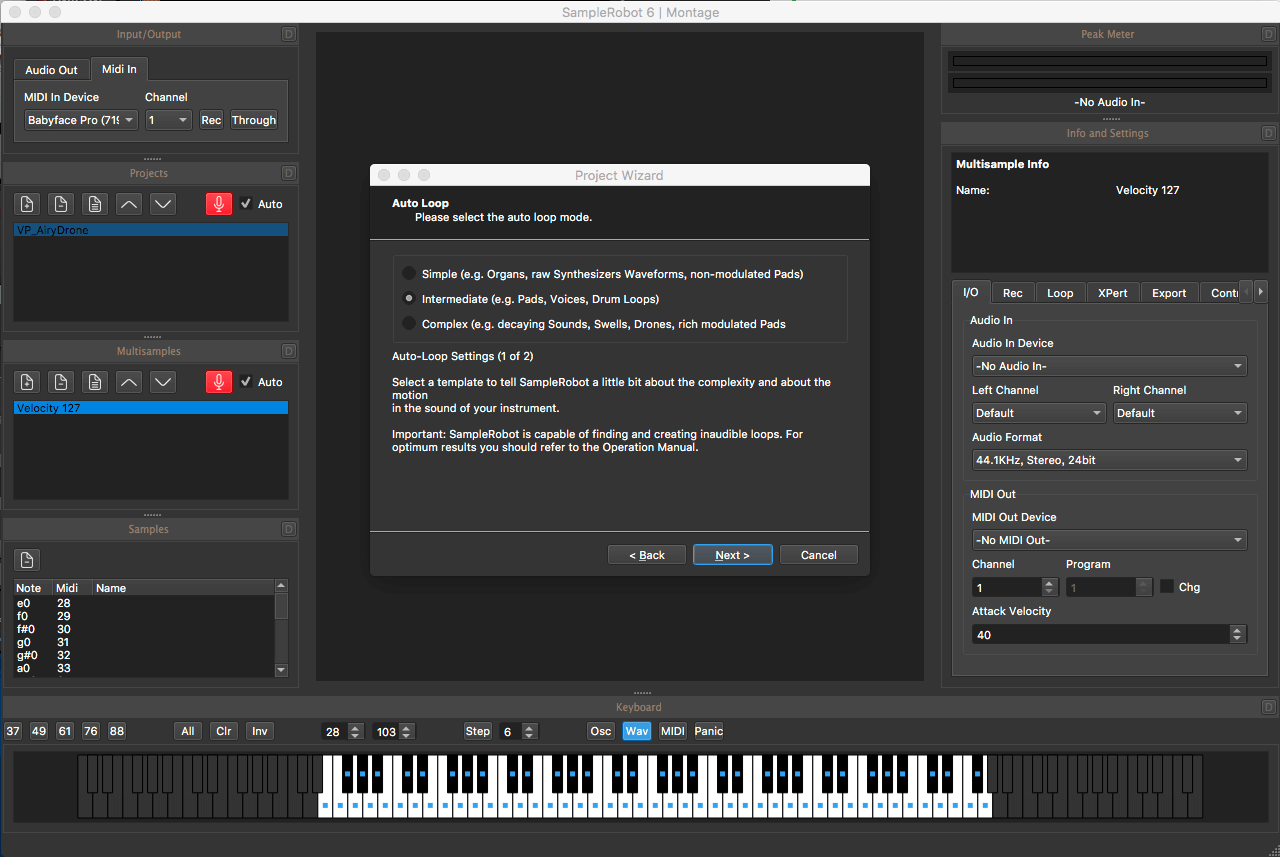
Auto Loop
Please select the auto loop mode
Simple (e.g. Organs, raw Synthesizers Waveforms, non-modulated Pads)
Intermediate(e.g. Pads, Voices, Drum Loop)
Complex(e.g. decaying Sounds, Swells, Drones, rich modulated Pads)
Auto-Loop Setting(1 of 2)
Elect a template to tell SampleRobot a little bit about the complexity and about the motion in the sound of your instrument.
Important: SampleRobot is capable of finding and creating inaudible loop. For optimum results you should to the Operation Manual.オートループ
自動ループモードを選択してください単純(例:オルガン、生のシンセサイザ波形、無変調パッド)
中間(例えば、パッド、ボイス、ドラムループ)
コンプレックス(例えば、減衰するサウンド、スウェル、ドロン、豊富な変調されたパッド)オートループ設定(1/2)
SampleRobotに、楽器の音の複雑さや動きについて少し説明するためのテンプレートを選んでください。
重要:SampleRobotは、聞き取れないループを見つけて作成することができます。 最適な結果を得るには、操作マニュアルを参照してください。
SampleRobot Montage Edition Auto Loop setting 2.
ここでは、サンプルのLoop始まりの長さを設定します。大体の場合は、50%でうまく行きますが結果を聞いてダメそうなら変更する感じの調整が必要になります。
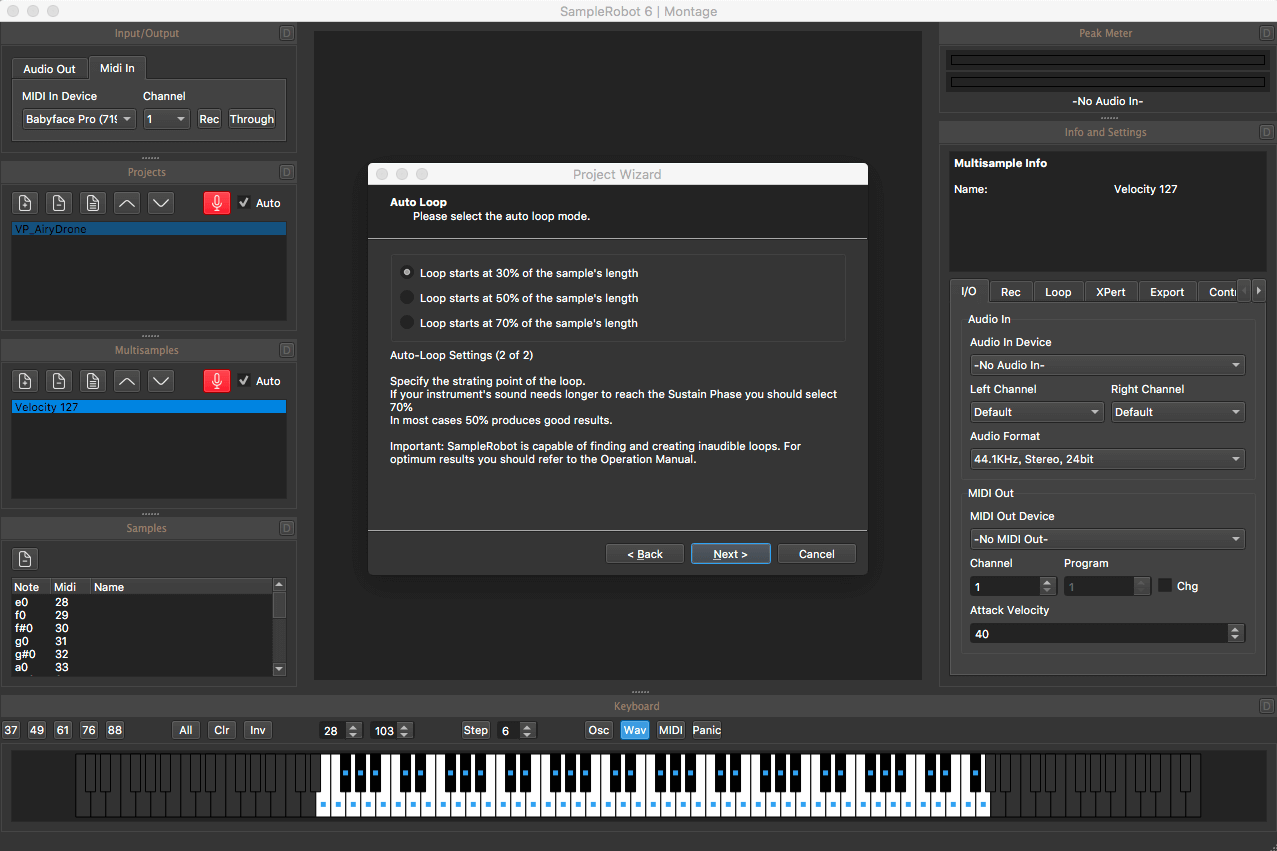
Auto Loop
Please select the auto loop mode
Loop starts at 30% of the samples length
Loop starts at 50% of the samples length
Loop starts at 70% of the samples lengthAuto-Loop Setting(2 of 2)
Specify the starting point of the loop.
If your instrument”s sound needs longer to reach the Sustain Phase you should select 70% In most cases 50% produces good results.
Important: SampleRobot is capable of finding and creating inaudible loop. For optimum results you should to the Operation Manual.オートループ
自動ループモードを選択してください
ループはサンプルの長さの30%から始まります
ループはサンプルの長さの50%から開始します
ループはサンプルの長さの70%から始まりますオートループ設定(2/2)
ループの開始点を指定します。
あなたのインストゥルメントのサウンドフェーズに達するまでの時間が長く必要な場合は、70%を選択する必要があります。ほとんどの場合、50%が良い結果を出します。
重要:SampleRobotは、聞き取れないループを見つけて作成することができます。 最適な結果を得るには、操作マニュアルを参照してください。
SampleRobot Montage Edition Project Configuration Completed.
設定終了画面です。

Project configuration Completed
SampleRobot is now ready for recording.
important: After the recording is done you must export Project(Menu “Import/Export”) to play your newly created instrument with your sampler.
By clicking on “Finish” SampleRobot will create your project and open the record dialog.
You can then click on “Start to begin the recording process.
Tip: Whenever problems or question arise:Take a look at the manual which you can access via the “Help”menu.
Note:You can start the project wizard anytime from the “File” menu.
プロジェクトの設定が完了しました
これでSampleRobotの録音準備が整いました。重要:録音が終わったら、サンプラーで新しく作成した楽器を再生するために、プロジェクト(「インポート/エクスポート」メニュー)をエクスポートする必要があります。
「完了」をクリックすると、SampleRobotはプロジェクトを作成し、レコードダイアログを開きます。
「開始」をクリックして、録音処理を開始することができます。
ヒント:問題や疑問が生じたときは、「ヘルプ」メニューからアクセスできるマニュアルを見てください。
注:[ファイル]メニューからいつでもプロジェクトウィザードを開始できます。
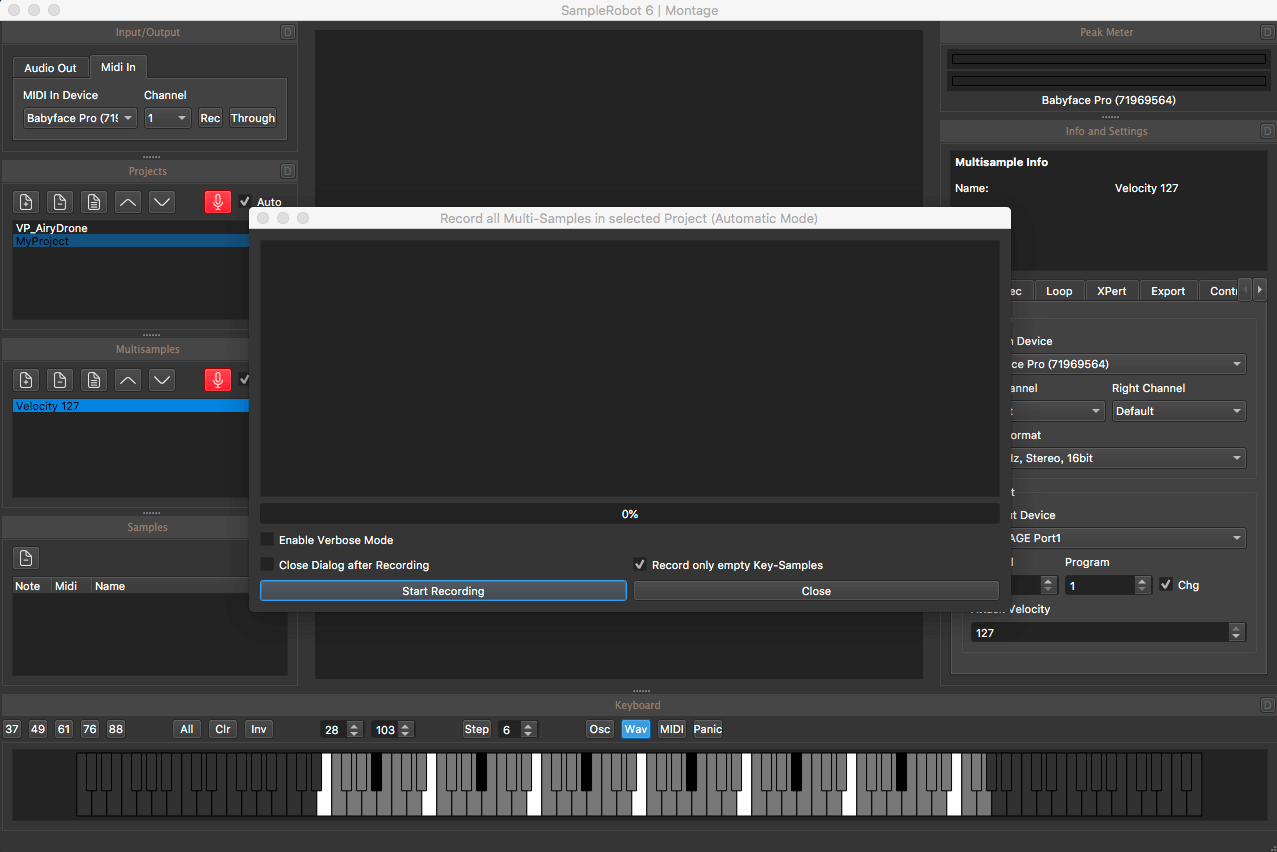
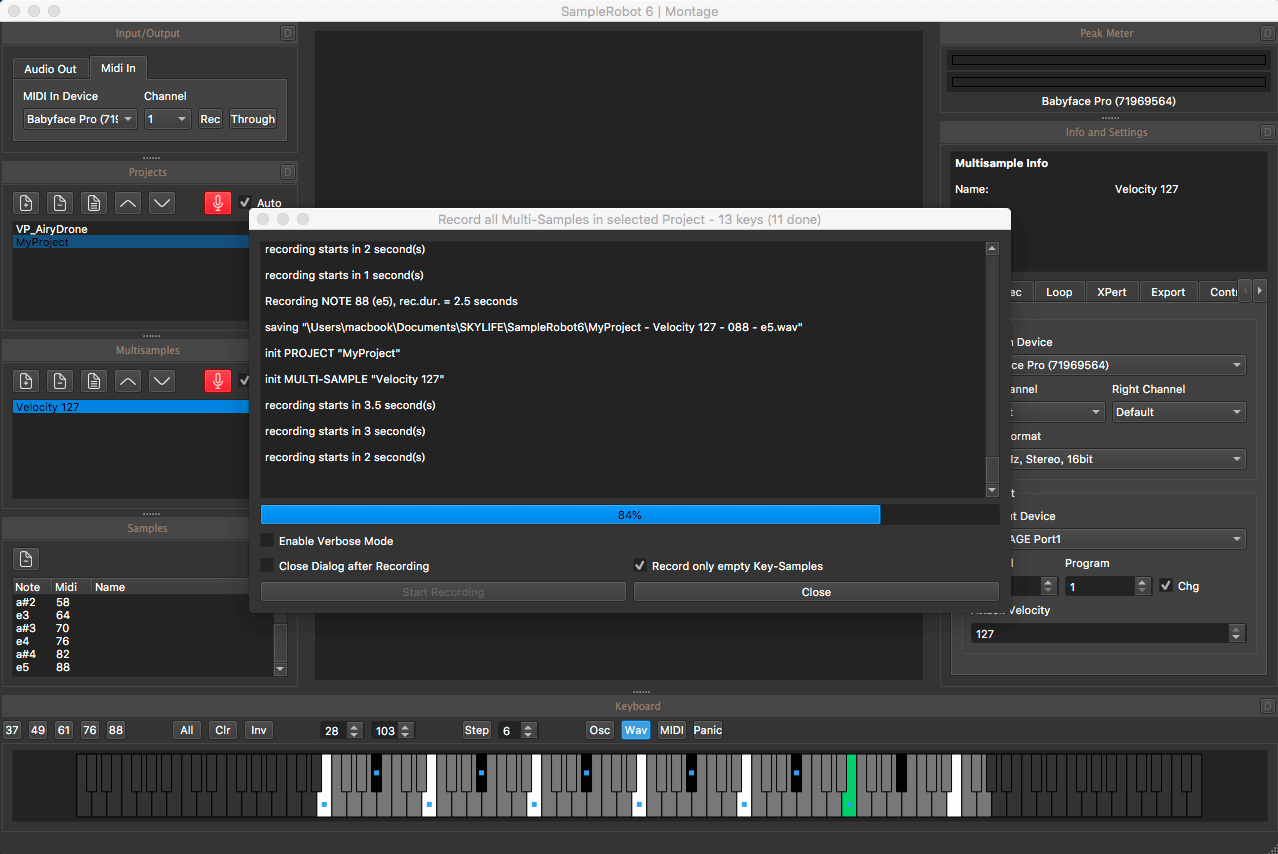
SampleRobot Montage Edition Auto Recording.
設定が終了しStartRecording ボタンを押すと自動的にサンプリングを開始してくれます。

SampleRobot Montage Edition Export Project.
サンプリングが終了したらFileメニューのImport/Export/ Export selected Project as / Yamaha Montage(*.X7U)を選択してファイルを作成する。保存したファイルをUSBに保存してください。

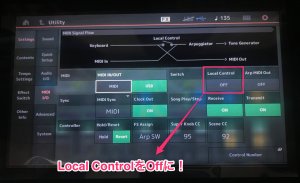
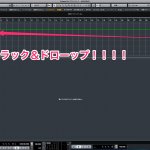
SampleRobot Montage Edition Montageにデータインポート.
保存したUSBをMontageにぶっ刺してUtility画面よりデーターをLOADしたら終了だ。

SampleRobot Montage Edition 使ってみてまとめ.
実際、サンプリングしたものをMontageで聞いてみたがかなりクオリティーが高いし使える。Montageユーザーは、無料なので是非ともダウンロードしてもらいたい。
VST音源もサンプリングしようと試みたが、どうもsamplerobotにオーディオ入力が入らず挫折してしまった。(笑 よくよく考えたらもう一台、オーディオインターフェイスがあれば取り込めるんじゃないかと思うので使ってないプロペラのBalanceを引っ張り出して次回、チャレンジしてみたいと思う。また、製品版のSamplerobot proは、Korg Kronosや色々Exportできるみたいなので興味のある方は、大体$299くらいなので購入してみては如何でしょうか。
SampleRobot 6のラインナップは8月下旬にリリースされる予定で、価格は次のとおりです。
SampleRobot 6 Pro(WaveRobotを含む) - 299 $ / 249€/ 219£
SampleRobot 6 Multi-X(WaveRobotを含む) - 199 $ / 169€/ 149£
SampleRobot 6 Korg + Wave(WaveRobotを含む) - 99 $ / 79€/ 69£
SampleRobot Montage Edition ダウンロード方法
米国YAMAHAのアカウントとmontageのシリアルが必要になります。米国YAMAHAのアカウントは無料で制作可能です。Montageの音源(無料配布もあり)なども販売しているのでmontage購入者は登録しておいたほうが良いです。
SAMPLEROBOT FOR MONTAGE(無料)

※ダウンロードには、Yamaha登録(米国)とMontageのシリアルが必要です。
YAMAHA MONTAGE 販売サイト
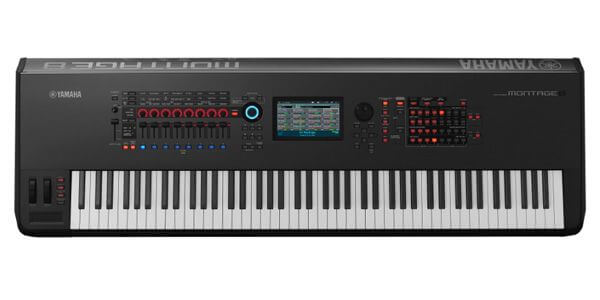
YAMAHA ( ヤマハ ) / MONTAGE8 (88鍵)
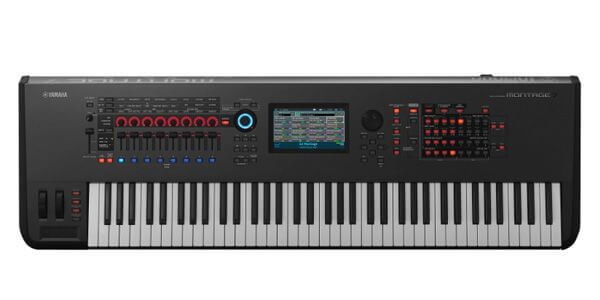
YAMAHA ( ヤマハ ) / MONTAGE7 (76鍵)
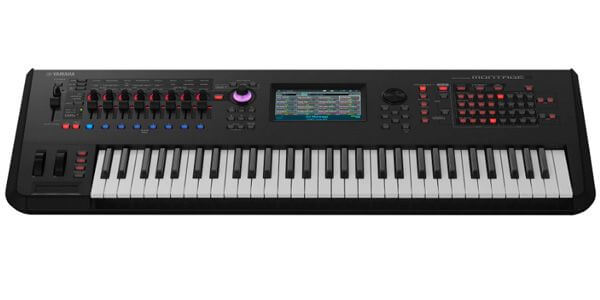
YAMAHA ( ヤマハ ) / MONTAGE6 (61鍵)
デワデワ
enjoy music!